Creating and Using Presets
How to work with presets in Perfectly Clear Workbench
Presets allow you to save and reuse specific image correction configurations. The Workbench includes system presets organized by category, and supports custom user presets for your own workflows.
How presets work
Presets are saved configurations that store all correction settings as a single reusable profile. Understanding their structure helps you work with them more effectively.
A preset stores the complete state of all correction parameters as a single configuration. When you apply a preset, all settings are updated to match the saved configuration.
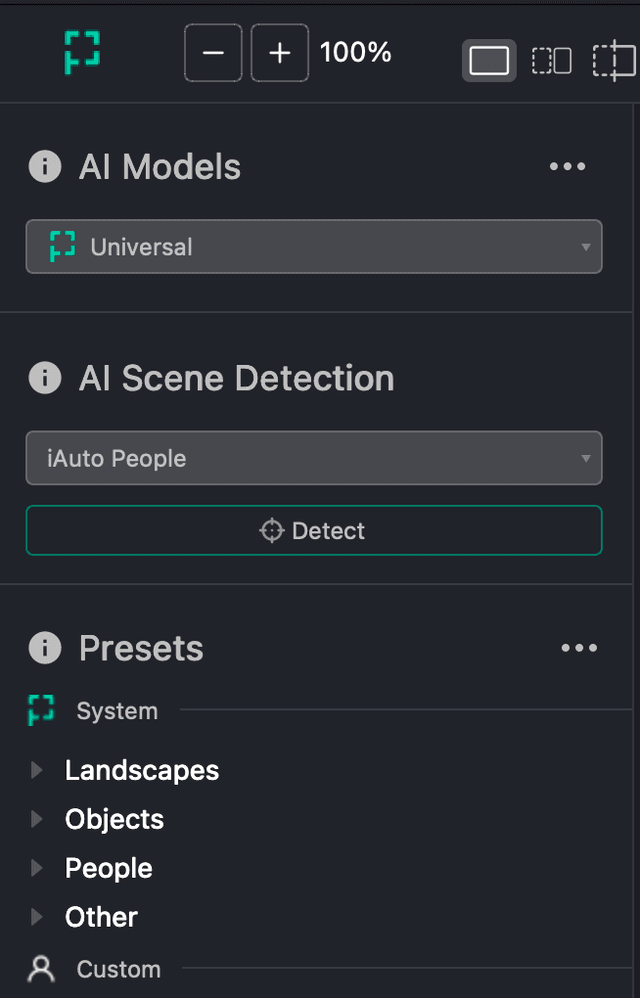
Presets are organized into categories in the left panel (visible in Edit mode):
| Category | Description |
|---|---|
| System | Built-in presets provided by Perfectly Clear |
| Landscapes | Optimized for outdoor, nature, and scenic photography |
| Objects | Tuned for product photography and still life images |
| People | Portrait-focused with skin enhancement options |
| Other | General-purpose presets for various use cases |
| Custom | User-created presets saved from your configurations |
Applying presets
When you apply a preset, all correction settings are instantly updated to match the saved configuration.
In Edit mode
Edit mode uses a hierarchical preset browser organized by category.
- Expand the Presets section in the left panel.
- Click on a category to expand it (Landscapes, Objects, People, ...).
- Click on any preset name to apply it.
- The right panel updates to show the new settings, and the preview reflects the changes.
Creating your own presets
Custom presets let you save configurations that match your specific workflow or aesthetic preferences. Once created, they appear alongside system presets for easy access.
Step-by-Step: creating a custom preset
Follow these steps to create and save a new preset from your current settings.
-
Switch to Edit mode to access all correction parameters.
-
Configure your settings:
- Select your preferred AI Model.
- Choose a Scene setting if applicable.
- Enable and adjust the correction modules you want to include.
- Fine-tune parameters until you achieve your desired look.
-
Test on multiple images:
- Load several images of the type you'll use this preset for.
- Apply your settings to each and verify consistent results.
- Adjust parameters if needed for broader compatibility.
-
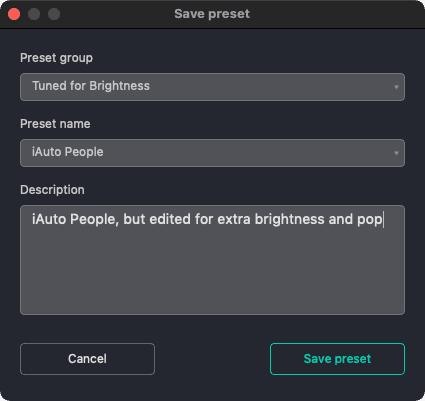
Save the preset:
- Click Save as new preset at the bottom of the right panel.
- Enter a descriptive name for your preset.
- The preset appears under the Custom category.
Manage custom presets
Custom presets are stored locally on your system and can be renamed, deleted, or exported, as needed. Click on the overflow button on your custom preset to reveal options such as:
- Export preset
- Clone preset
- Rename preset
- Delete preset
Exporting presets
Workbench allows you to export three types of .preset files:
- an AI Model - one file, all presets in an AI Model. This happens when you click the export button on an AI Model (e.g. Universal).
- a preset group - one file, multiple presets. This happens when you click the export button on a preset category (e.g. Landscapes). These are only used to import into other Workbench instances, not for use in the SDK, WebAPI, Docker or other production solutions.
- a single preset - one file, one preset. This happens when you click the export button on a single preset.

See the full Workbench documentation for more details on managing presets.